
So first up, potstickers! I decided to make these for a potluck I was going to last night. Of course, it didn't occur to me to take pictures until after I'd already started making the filling, and by then my hands were a bit dirty to haul out the camera. I decided not to let that stop me. But I did decide to cook the dumplings on site at my friend's house, so no pics of the finished product.
I'm actually making more tonight (made WAY more filling than I had wrappers for), so look for more and better pictures tomorrow. In the meantime, a little backstory. My grandma used to make dumplings for us all the time when I was little. Actually, my parents made them too, but somehow I always remember my grandma's as being better. It may have had something to do with the fact that my parents boiled theirs, which technically makes them "jiao-zi" as opposed to pan-frying them, which is what makes them "potstickers."
I started with about 1 1/4 - 1 1/2 lb. of ground turkey. Normally I use ground pork, but my friend doesn't eat pork, so I decided to try out turkey instead. I figure you could say they're sort of healthy that way. But be sure to get the fattier kind, not the all-lean ground turkey breast, or they will be dry dry dry.
Next I added about 1 tablespoon of Chinese rice wine and 1 tablespoon of soy sauce. In a food processor, I finely chopped 2 cloves of garlic and a bunch of Chinese garlic chives. I've also seen them called leek chives - they kind of look like green onions, but with out the white part on the bottom. It came about to about 1 cup, chopped. Mix that into the meat. Salt & pepper to taste. It'll look kind of like this.
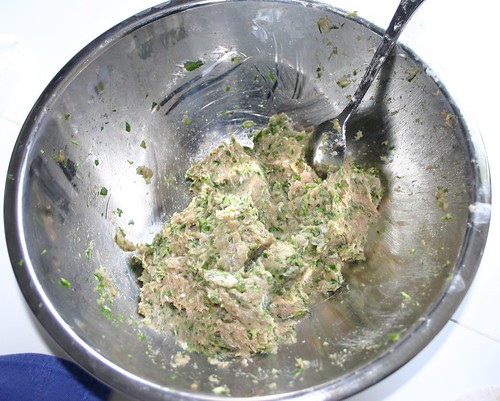 I know, not super appetizing, but it's raw meat. You can't expect too much. Now for the fun part, filling and wrapping!
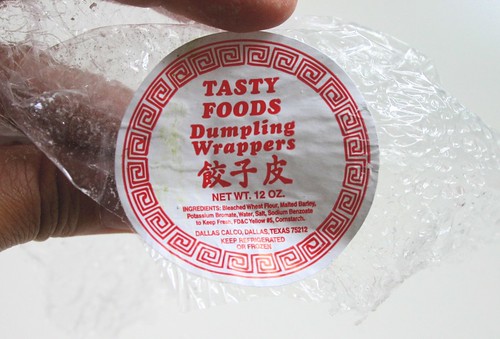
I'm usually not a big fan of store-bought wrappers/skins. They tend to be a bit on the thin side, especially if you're going to be pan-frying. My parents used to make their own skins, but then I think that was out of necessity since I don't think they sold pre-made ones back then. I don't have the patience to mess around with making my own, so I usually make do with what I can find. I did discover this brand of skins at my local Asian grocery, and they seem to be about the right thickness. It was in the refrigerated section instead of frozen and is actually made locally. Score!
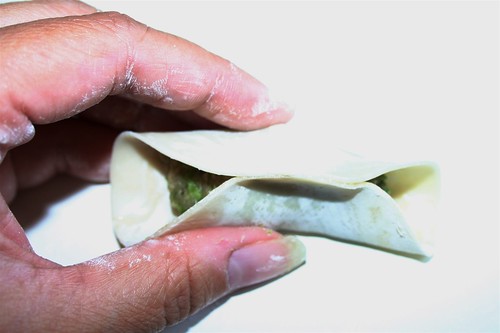
Put a dollop of filling in the center of a wrapper - I'd guess a little more than a teaspoon. You want them to be nice and meaty, but you also don't want to overstuff them because then you'll have meat squishing out the sides when you try to seal them up. Ick. Next, dip your finger in a bowl of water, and moisten around the edge of the top half the wrapper (in a semi-circle).

Fold in half and pinch in the middle to seal (excuse the crappy quality of the picture):
Now you want to crinkle or pleat the edges and press to seal. It's hard to show in a picture since I usually use both hands to do it but I needed one to take the picture. Basically, think of when you crimp the edge of a pie crust. It's sort of like that.
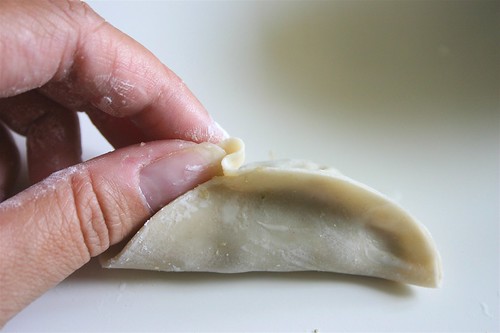

Depending on how big the wrapper is, I do maybe 2-3 pleats on each side of the center. When you're done, it should look something like this:
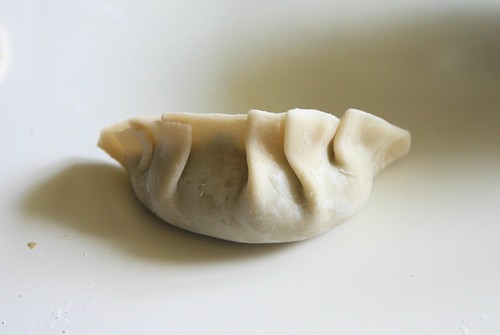
There are actually different ways of folding these, but I like this method because they kind of sit up on their own, which is nice for pan-frying. If you're just going to be boiling them, you could just fold them straight over in half and pinch them closed to make a semi-circle.
One package of wrappers yielded just under 40 potstickers, but didn't use up all my filling. I tried defrosting a package I had in the freezer (different brand, so they were a bit different in texture and size), but they were a bit old and freezer-burned and after cooking up a couple testers, I decided against it.
As I get them wrapped, I usually put the dumplings on a cookie sheet lined with a clean dishtowel and then keep them covered with another dishtowel (also clean, of course) to keep them from drying out. If you're not going to cook and eat them right away (or if you're making an enormous batch, like I am) then you can just stick the whole pan into the freezer. Once they're frozen, you can toss them into a ziploc bag and just cook them as needed. Tastier (and cheaper) than the storebought kind!

In part 2, I'll make a different kind of filling and have more details on cooking and serving.
No comments:
Post a Comment